

How to Blend Extension Layers for a Natural Finish

A beautiful extension result should not announce itself when you move your head, tie your hair up or wear it straight. Knowing how to blend extension layers is what turns added length or volume into hair that looks convincingly your own. It is not simply a case of cutting the extensions to match the shortest layer. The placement, density, haircut, colour and daily styling all need to work together.
For clients with fine hair, a blunt one-length haircut or a previous extension set that feels obvious at the ends, the difference made by thoughtful blending can be significant. At Sara Styles Hair in Bethnal Green, the aim is always wearable, natural-looking hair that still feels like you.
Start with the right extension placement
Layering begins before the scissors come out. If tape extensions are placed too close to the hairline, too high around the crown or too low at the nape, no amount of cutting will make them disappear properly. The natural hair needs enough coverage to move over the tapes, particularly when the hair is lifted, parted differently or worn in a ponytail.
A specialist will assess where your own hair is strongest, how you usually wear your parting and whether you want length, fullness or both. Fine hair often needs a lighter, more considered placement than thicker hair. Adding too many tapes can create visible sections and put unnecessary tension on fragile lengths, while too little hair may leave a disconnect between your natural ends and the extension hair.
The goal is balance. Extensions should support the shape of the cut rather than sit underneath it as a separate, heavier layer.
How to blend extension layers with the haircut
The most natural result comes from cutting the extensions and natural hair together once the extensions are fitted. Pre-cut extension hair can be useful as a starting point, but it cannot account for your head shape, growth patterns, existing layers or the way your hair falls day to day.
For a soft, lived-in finish, I usually begin by establishing the overall perimeter. This prevents the ends looking thin or overly feathered. From there, gentle internal layering can remove any obvious shelf between the natural hair and the added lengths.
The technique depends on your existing haircut. A client with long, blended face-framing layers may need only light point cutting through the extensions so the movement continues naturally. Someone with a blunt bob growing out may need a more gradual transition, with the shortest natural pieces carefully connected to the added length.
Over-layering is one of the most common mistakes. Removing too much weight can make extension hair look stringy, especially after a few washes. It can also leave fine natural hair with too little support to conceal the tapes. A polished blend should retain enough density at the ends to look healthy.
Face-framing pieces need a lighter touch
The area around the face is where poorly blended extensions are noticed first. It is tempting to create dramatic short layers, but these can expose the line where natural hair ends if your own hair is fine or shorter around the temples.
A softer face frame usually works best with tape extensions. The shortest pieces should belong to your natural hair where possible, with the extensions supporting the longer lengths behind them. This keeps the finish elegant whether the hair is waved, smooth or tucked behind the ears.
Match the colour as well as the cut
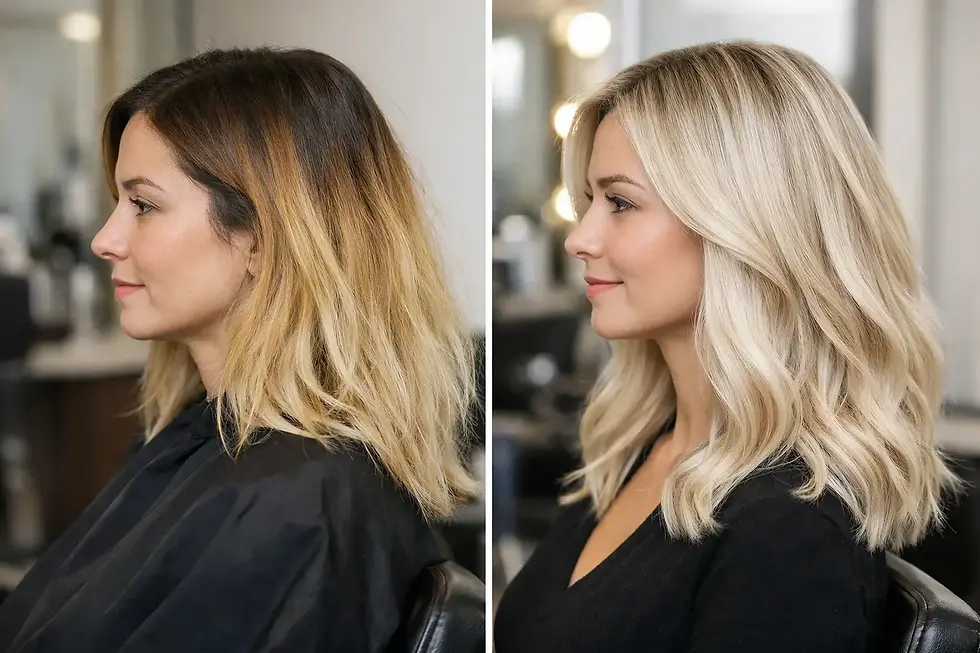
Even a technically excellent cut can look separate if the colour is too flat or mismatched. Natural hair has variation from root to end, particularly with balayage, highlights, grey blending or faded colour. One block shade of extensions may look obvious beside it.
Using more than one extension shade can create the dimension that makes the blend believable. A slightly deeper tone can add depth beneath the top layer, while a lighter ribbon through the mid-lengths can echo existing highlights. This is especially useful for clients who want brighter hair without colouring every inch of their natural lengths.
The colour should be assessed in natural light as well as under salon lighting. Tone matters as much as depth: a very warm extension against a cool brunette or an overly ash blonde against a creamy balayage will stand out, even when the shade looks close on a colour ring.
If your colour has changed since your extensions were fitted, do not try to tone the extension hair at home. Extension hair responds differently from natural hair, and a quick fix can lead to uneven results. A professional colour consultation is the safest way to decide whether the hair can be refreshed or whether a new shade combination is needed.
Style the hair so the layers move together
A good blend should work without hours of styling, but your finishing technique still affects how natural it looks. When hair is very straight, every line is more visible. A smooth blow-dry with a little bend through the ends can soften the transition between your own hair and the extensions.
For waves, curl the natural hair and extensions together in medium sections rather than curling each separately. Alternate the direction of the curl, leave the last few centimetres softer, then brush through once the hair has cooled. This creates movement rather than defined, disconnected rings.
Avoid applying heavy oils or rich masks close to the tape tabs. They can cause the adhesive to slip and make the roots look flat. Keep conditioning treatments through the mid-lengths and ends, where they help preserve softness and shine.
Maintenance protects the blend
Extension layers do not stay perfect by accident. As your natural hair grows, the tapes move further away from the scalp and the original placement changes. This can make the extensions feel heavier, more visible or less comfortable, particularly around the sides.
Regular maintenance appointments allow the extensions to be removed, the natural hair to be checked and the tapes to be refitted in the correct position. It is also the right time to refine the haircut. Natural hair may have grown, been trimmed or changed condition between appointments, so a small adjustment keeps the shape looking intentional.
At home, brush gently from the ends upwards, supporting the roots with your hand. Brush before washing, before bed and after exercise if your hair has become tangled. Sleep with the hair dry and loosely secured in a low braid or ponytail to reduce friction.
If you notice slipping tapes, matting at the root, discomfort or a section that suddenly looks exposed, book in rather than trying to remove or reposition it yourself. Early attention is kinder to your natural hair and usually simpler to correct.
When a blend needs correcting
Sometimes the issue is not the layers alone. Extensions can look blunt because the set is too long for the current haircut, too dense for the amount of natural hair, or placed without enough hair left out around the perimeter. In these cases, cutting more layers into the extensions may only make the problem worse.
A proper consultation looks at the full picture: the health of your hair, the tape placement, the quality and condition of the extension hair, the colour match and the shape you want to achieve. For damaged or fragile lengths, a lighter set with a stronger cut can often look more convincing than adding extra hair.
The most flattering extension blend is not about creating the maximum amount of length. It is about choosing a shape that suits your natural density, lifestyle and styling routine, then maintaining it with care. When the cut, colour and placement are considered together, extensions should give you confidence without ever feeling like a disguise.
See Real Results
Explore real client transformations from Sara Styles Hair in East London on Instagram.
Book Your Appointment
Book a one-to-one appointment at Sara Styles Hair in Bethnal Green, East London, for a personalised tape extension consultation and blend.


Comments